DIY Beeswax Wraps: An Easy, Sustainable Alternative to Plastic Wrap
If you’re looking for a simple way to reduce waste in your kitchen, DIY beeswax wraps are a great place to start. These reusable food wraps can replace plastic wrap for covering bowls, wrapping sandwiches, storing cheese, and keeping produce fresh. They’re inexpensive to make, easy to customize, and fit perfectly into a self-sufficient homestead lifestyle.
Why Use Beeswax Wraps?
Traditional plastic wrap is designed for one-time use and often ends up in landfills. Beeswax wraps offer a reusable alternative that can last up to a year with proper care.
Benefits of beeswax wraps include:
- Reducing household waste
- Saving money over time
- Using natural ingredients
- Supporting a low-tox kitchen
- Making thoughtful homemade gifts
Plus, they smell amazing thanks to the natural beeswax!
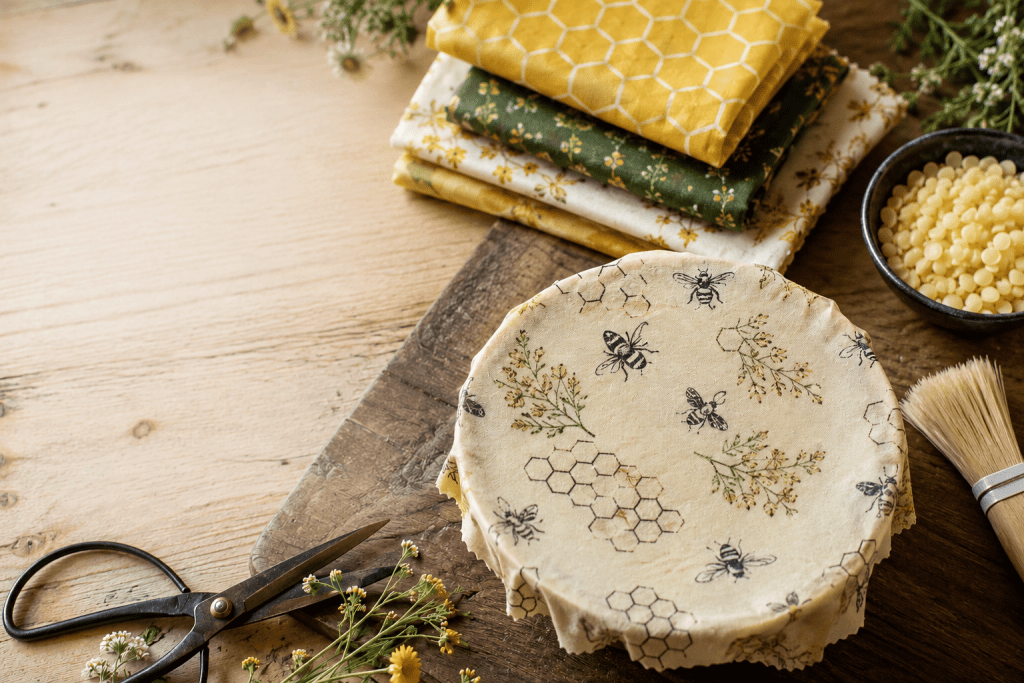
Supplies You’ll Need
100% cotton fabric
Beeswax pellets or grated beeswax
Parchment paper
Baking sheet
Paintbrush (optional)
Scissors or pinking shears
Choosing Fabric
Lightweight cotton works best. Old cotton sheets, flannel shirts, or quilting cotton are all excellent options. Wash and dry the fabric before starting.
How to Make Beeswax Wraps
Step 1: Cut Your Fabric
Cut fabric into desired sizes:
- Small (8″ x 8″) for snacks and cut produce
- Medium (10″ x 10″) for sandwiches
- Large (12″ x 14″) for bowls and bread
Pinking shears help reduce fraying but aren’t required.
Step 2: Prepare the Baking Sheet
Place parchment paper on a baking sheet and lay the fabric flat.
Step 3: Add Beeswax
Sprinkle a thin, even layer of beeswax pellets over the fabric.
Less is more—you can always add additional wax if needed.
Step 4: Melt the Wax
Bake at 200°F for 3–5 minutes or until the wax is fully melted.
Step 5: Spread Evenly
Carefully remove the tray and use a paintbrush to spread the melted wax across the entire fabric surface.
Step 6: Cool
Lift the fabric by the corners and gently wave it in the air. It will harden within seconds.
Your beeswax wrap is now ready to use!food is only part of the equation.
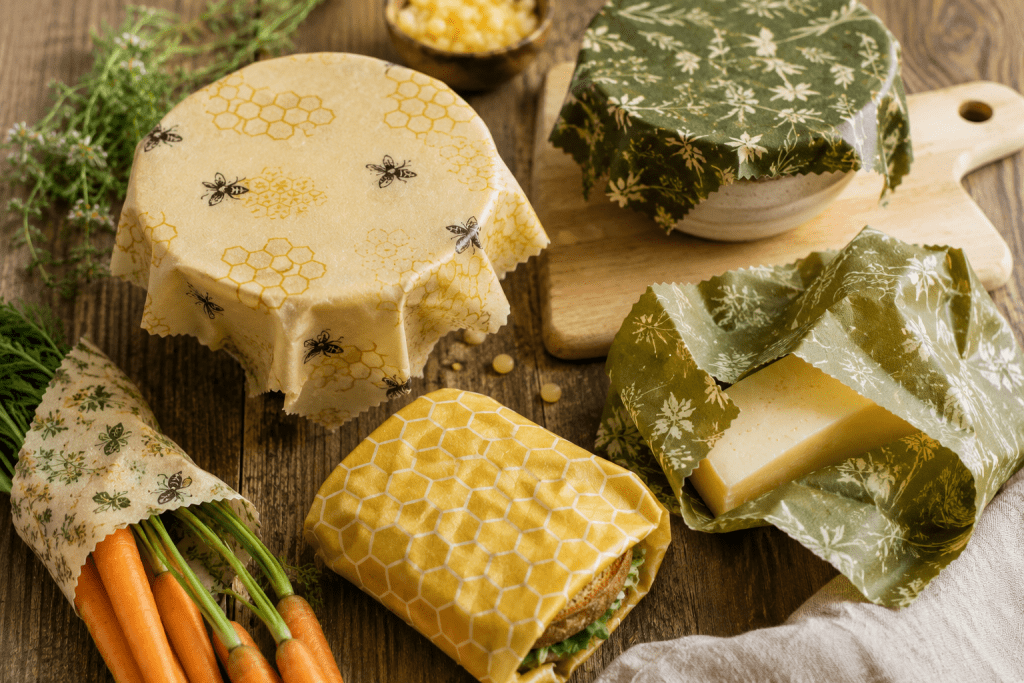
How to Use Beeswax Wraps
The warmth of your hands softens the wax slightly, allowing the wrap to mold around food or containers.
Perfect for:
- Homemade bread
- Sandwiches
- Cheese
- Fresh herbs
- Cut fruits and vegetables
- Covering bowls
What Not to Wrap
Avoid using beeswax wraps with:
- Raw meat
- Raw fish
- Hot foods
- Microwave use
The heat can melt the wax and damage the wrap.
Cleaning and Care
To help your wraps last as long as possible:
- Wash in cool water with mild dish soap
- Air dry completely
- Store flat or rolled
- Keep away from direct heat
With proper care, beeswax wraps can last 6–12 months.
Refreshing Old Wraps
If your wraps begin to lose their stickiness, simply place them back on a parchment-lined baking sheet, add a small amount of beeswax, and reheat.
This can extend their life for many more months.
A Small Change That Makes a Big Difference
The Living a more sustainable lifestyle doesn’t require huge changes overnight. Sometimes it’s the small habits—like replacing disposable plastic wrap with reusable beeswax wraps—that add up over time.
Whether you’re just beginning your homestead journey or looking for practical ways to reduce waste, homemade beeswax wraps are an easy weekend project that your whole family can enjoy.
Have you tried making beeswax wraps? Share your experience in the comments below!